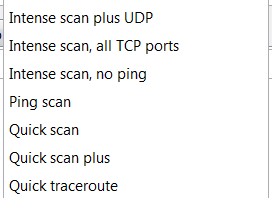
Zenmap is the GUI for the very popular free port scanner Nmap. It comes pre loaded with 10 different scan types which we will take closer look at them in this article. Some of the scan types are kind of obvious, however they may not be to everyone.
Nmap was created by Fyodor (Gordon Lyon, twitter, about) and has been actively developed since 1997. Big thanks to Fyodor for creating and maintaining such awesome software.
The presets
Before we go into the different options in use I will make a brief explanation of each of the presets that come with Zenmap.
Intense scan
Command: nmap -T4 -A -v
Should be reasonable quick, scan the most common TCP ports. It will make an effort in determining the OS type and what services and their versions are running.
This comes from having a pretty fast timing template (-T4) and for using the -A option which will try determine services, versions and OS. With the verbose output (-v) it will also give us a lot of feedback as Nmap makes progress in the scan.
Intense scan plus UDP
Command: nmap -sS -sU -T4 -A -v
Same as the regular Intense scan, just that we will also scan UDP ports (-sU).
The -sS option is telling Nmap that it should also scan TCP ports using SYN packets. Because this scan includes UDP ports this explicit definition of -sS is necessary.
Intense scan, all TCP ports
Command: nmap -p 1-65535 -T4 -A -v
Leave no TCP ports unchecked.
Normally Nmap scans a list of 1000 most common protocols, but instead we will in this example scan everything from port 1 to 65535 (max). The 1000 most common protocols listing can be found in the file called nmap-services.
Intense scan, no ping
Command: nmap -T4 -A -v -Pn
Just like the other intense scans, however this will assume the host is up. Usefull if the target is blocking ping request and you already know the target is up.
Ping scan
Command: nmap -sn
Do only a ping only on the target, no port scan.
Quick scan
Command: nmap -T4 -F
Scan faster than the intense scan by limiting the number of TCP ports scanned to only the top 100 most common TCP ports.
Quick scan plus
Command: nmap -sV -T4 -O -F –version-light
Add a little bit of version and OS detection and you got the Quick scan plus.
Quick traceroute
Command: nmap -sn –traceroute
Use this option when you need to determine hosts and routers in a network scan. It will traceroute and ping all hosts defined in the target.
Regular scan
Command: nmap
Default everything. This means it will issue a TCP SYN scan for the most common 1000 TCP ports, using ICMP Echo request (ping) for host detection.
Slow comprehensive scan
Command: nmap -sS -sU -T4 -A -v -PE -PP -PS80,443 -PA3389 -PU40125 -PY -g 53 –script “default or (discovery and safe)”
This scan has a whole bunch of options in it and it may seem daunting to understand at first. It is however not so complicated once you take a closer look at the options. The scan can be said to be a “Intense scan plus UDP” plus some extras features.
It will put a whole lot of effort into host detection, not giving up if the initial ping request fails. It uses three different protocols in order to detect the hosts; TCP, UDP and SCTP.
If a host is detected it will do its best in determining what OS, services and versions the host are running based on the most common TCP and UDP services. Also the scan camouflages itself as source port 53 (DNS).
The options
-T4 This is an option for timing template. Numbers range from 0-5 where 5 is the fastest and 0 is the slowest.
So what is a timing template? Basically it is Nmap’s developers giving the user an easy way of tuning how fast Nmap performs. The Nmap manual translates the different numbers to this:
0: paranoid 1: sneaky 2: polite 3: normal 4: aggressive 5: insane
Again, this translates into 1-2 being used for IDS evasion, 3 is the default and 4-5 is really quick scans. As an example when I run a regular scan on one host with -T2 it took me 400 seconds while -T5 0.07 seconds. Read more about this in the Timing and Performance section of the manual.
-A This options makes Nmap make an effort in identifying the target OS, services and the versions. It also does traceroute and applies NSE scripts to detect additional information. This is a quite noisy scan as it applies many different scans. The NSE scripts applied is the default setting of scripts.
The -A option is equivalent to applying the following options to your scan: -sC -sV -O –traceroute
-v Increased verbosity. This will give your extra information in the data outputted by Nmap.
-sS Perform a TCP SYN connect scan. This just means that Nmap will send a TCP SYN packet just like any normal application would do. If the port is open the application must reply with SYN/ACK, however to prevent half open connections Nmap will send a RST to tear down the connection again. If you were to look at such a scan in Wireshark you would see something like this:

-sU Perform an UDP scan. Because UDP is unreliable it is not as easy to determine if ports are open as it is with TCP. The UDP scan sends an UDP packet with an empty header to the target port. If the port is closed the OS should reply with an ICMP port unreachable error, however if the port is open it does not necessarily mean that the service will reply with anything.
If service scan (-sV) is enabled in the scan, Nmap will send additional packets with different payloads in order to try trigger a response from the service. This type of scanning can be really slow because a typical OS will only allow about 1 ICMP packet per second. The following Wireshark screenshots illustrates where UDP port 69 is closed and UDP port 68 is either open or filtered.

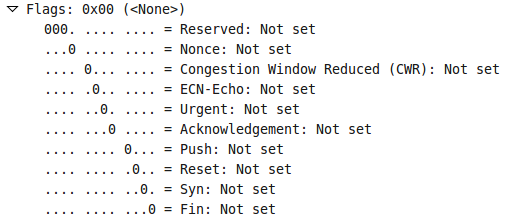
-sN TCP Null scan. This option sends TCP packets with none of the TCP flags set in the packet. If the scan is returned a RST packet it means the port is closed, however if nothing is returned it is either filtered or open. The following picture is an illustration in Wireshark showing none of the TCP flags have been set:

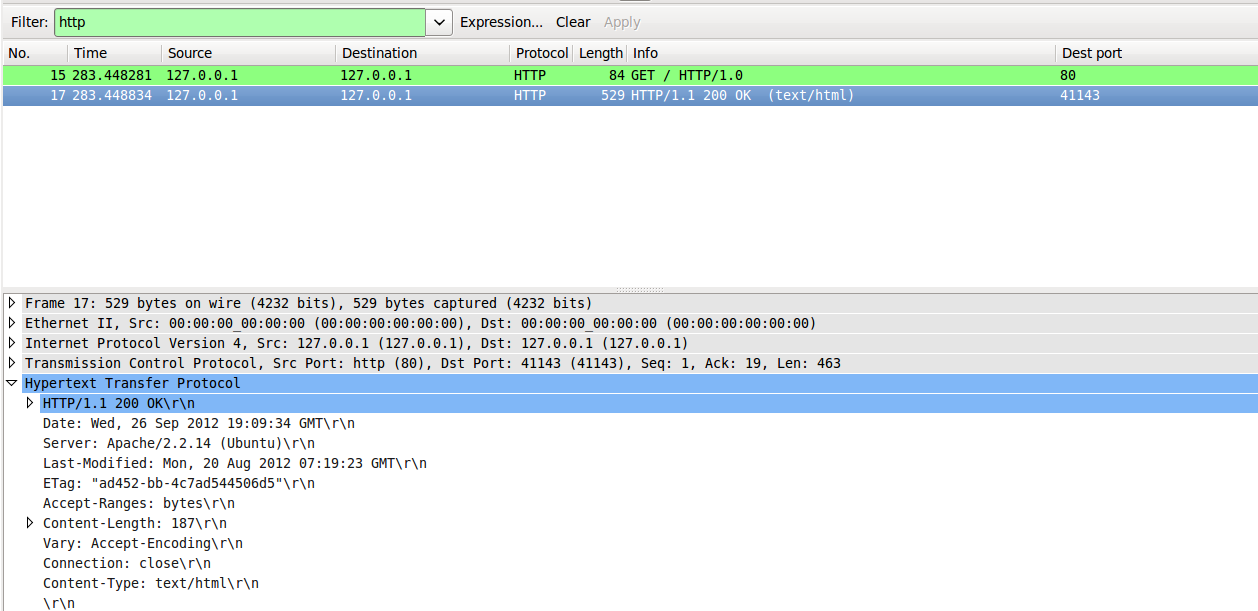
-sV Actively probe open ports to try determine what service and version they are running. When running this scan against my webserver it resulted in 14 packets being transmitted between client and server, in contrast to just 2 packets as with a regular SYN scan. The picture below shows version scanning packets being sent to the server and the response coming from the server. The HTTP header reveals the webserver, version and OS type in play.

-p Comma seperated list of ports being scanned. Easy way to define only a few ports to scan or increase the scope of the scan to e.g. every available TCP port.
-F Fast mode. Instead of scanning as many ports as the default scan does, the fast scan only scans a few. As a comparison, when I scanned with fast mode there was 202 packets exchanged, and with default scan (no parameters) there was 2002 packets exchanged. Both scans discovered port 80 and 22 open on the target host.
-O Make Nmap try decide what OS type it is. The process of OS detection can be quite complex, but also quite simple. It is based of many different factors which I cannot go through here. A simple factor to try decide whether it is a Windows OS or Unix OS is to look at the TTL (Time to live) field on packets being sent from the OS. Windows usually defaults to 128 while Unix defaults to 64.
–traceroute Perform a traceroute to the target.
–version-light This is an option for the service detection scans (-sV and -A) where it limits the number of probes being sent to the service. The limitation brought by this option means it will only probe the services with the most likely types of probes bringing back a successful result. If you are curious about what probes Nmap sends I recommend using the –version-trace option to get detailed information about the scan. An excerpt of different types of SSH probes can be seen here:
match ssh m|^SSH-([\d.]+)-RomSShell_([\w._-]+)\r\n| p/AllegroSoft RomSShell sshd/ v/$2/ i/protocol $1/
match ssh m|^SSH-([\d.]+)-IFT SSH server BUILD_VER\n| p/Sun StorEdge 3511 sshd/ i/IFT SSH/ d/storage-misc/
match ssh m|^Could not load host key\. Closing connection\.\.\.$| p/Cisco switch sshd/ i/misconfigured/ d/switch/ o/IOS/ cpe:/o:cisco:ios/a
match ssh m|^SSH-([\d.]+)-WS_FTP-SSH_([\w._-]+)\r\n| p/WS_FTP sshd/ v/$2/ i/protocol $1/ o/Windows/ cpe:/o:microsoft:windows/a
match ssh m|^SSH-([\d.]+)-http://www\.sshtools\.com J2SSH \[SERVER\]\r\n| p/SSHTools J2SSH/ i/protocol $1/
match ssh m|^SSH-([\d.]+)-DraySSH_([\w._-]+)\n\n\rNo connection is available now\. Try again later!$| p/DrayTek Vigor 2820 ADSL router sshd/ v/$2/ i/protocol $1/ d/broadband router/
-PE This parameter is used to decide how Nmap discovers hosts, and this one decides that Nmap should use ICMP echo requests to deciding if a host is up or not. This is the same as performing a ping to the target host in determining if it is up or not.
-PP This defines that instead of a regular ICMP echo request should be used in determining if host is up or not, Nmap should send a ICMP Timestamp request. This special type of ICMP request is originally used for synchronizing timestamps between communicating nodes, but has been replaced by the more common network time protocol. This type of scan was not successfull in determining if my host was up or not.

-PS Also used for host discovery. This option simply relies on a port (default 80) to reply to an empty SYN packet, as is with default TCP behaviour. Simple is often good.
In the preset scans you will notice that argument 80,443 is given to this option. These are common ports used for webservers and are often open on targets.
-PA Much like the -PS option, this one sends a TCP packet with the ACK flag set instead. This should cause the responding server to respond with a RST packet if it is listening on that port as it is not expecting any data to be acknowledged by an ACK packet. Sometimes firewall administrators configure the firewall to drop incoming SYN packets to prevent any traffic, which would allow for ACK packets to pass through.
In the preset scans you will notice that argument 3389 is given to this option. This is the port for remote desktop which is a service often enabled on servers. When other host detection methods fail, this may increase the success chance.
-PU This sends out a UDP packet destined to the target port (default 40125) in order to try elicit a an “ICMP Port unreachable” message from the server. Sometimes firewalls also only drop TCP packets and dont care about UDP packets, allowing this type of packets through. Some configurations also allow any type of packet through where only TCP should be allowed. Camoflaging your host discovery as an UDP packet on port 53 (DNS) could be a very stealthy approach.
-PY Very much like a TCP SYN scan, this just utilizes the SCTP (Stream Control Transmission Protocol) instead.
-g Specify what source port you want to use. Note that this is different from what destination port you are scanning. The real use for this comes with trying to evade IDS or blending inn with other regular data.
–script Via NSE (Nmap scripting engine) it is possible for anyone to write custom made scripts for Nmap to use. This parameter takes in a comma seperated list of files, categories and directories containing NSE scripts. Because NSE supports expressions you can tell Nmap to load scripts in many different ways.
With the “default or (discovery and safe)” argument it will tell Nmap to load all scripts from the default category, and only the scripts in discovery category that are also in the safe category.
-Pn Assume the host is up thus skipping the host discovery phase.
-sn Only send ping packet to the target, no port scanning. This is usefull if you need to determine what hosts are in the vicinity, but do not want to scan them yet. Do not mistake this for the TCP Null scan (-sN); Nmap is case sensitive.
Thats all folks! Happy scanning!

